


Building a new home is an exciting yet complex journey, one that involves many stages and careful coordination between multiple trades and professionals. Whether you’re planning to build your dream home or just curious about the construction process, understanding how a house is built from the ground up can make the experience much smoother and less overwhelming. This comprehensive guide walks you through the entire new home construction process, from preparing raw land to the final finishing touches, providing valuable insights that can help you navigate your own build with confidence.
If you’re searching for reliable Construction Companies Melbourne, this article will also give you an idea of what to expect and how construction specialists manage each phase to ensure quality and efficiency.
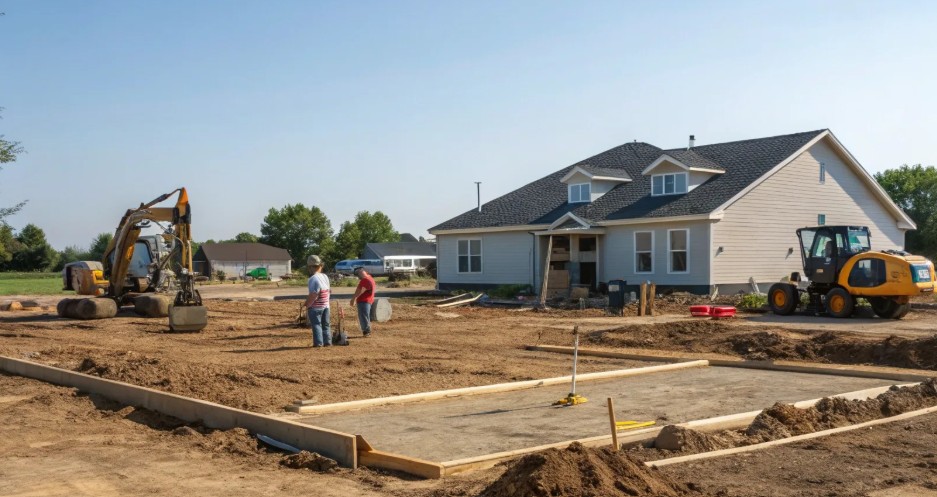
Preparing the Land: The Foundation of Your New Home
Before any construction can begin, the land must be carefully prepared and approved by local authorities. This process starts with plotting the raw piece of land, which involves mapping out streets, utilities, and individual home sites. Once the city approves the plat map, developers move forward with cutting in roads and installing essential infrastructure such as sewer, water, electricity, and gas lines to each lot.
Sidewalks, curbs, and gutters are also installed before the asphalt is laid, ensuring the neighborhood has proper drainage and accessibility. Only after this thorough preparation can the home builder submit house plans to the city for approval and secure the necessary building permits. This stage is crucial because a well-prepared site sets the foundation for a smooth construction process.
Excavation and Footings: Laying the Structural Base
Once the permits are in hand, excavation begins. Heavy machinery is used to dig a perfectly even hole where the home’s foundation will sit. This stage amazes many because of the precision involved—machines dig deep and leave soil in areas where features like a garage will be built, reducing the need for extra handling.
Next come the footings, which are the concrete bases that support the foundation walls. These are poured into metal forms reinforced with rebar, steel rods that strengthen the concrete and help tie the foundation together. After the footings cure, foundation walls are poured using concrete pumped through specialized trucks.
Metal bolts embedded in the foundation walls serve as anchor points for framing, providing a secure connection between the concrete base and the wooden structure above. Earthquake straps are also installed at this stage, which allow the house to flex slightly during seismic activity without collapsing.
Backfilling and Flat Work: Preparing for Framing
With the foundation walls cured, the next step is backfilling. Soil is carefully pushed back against the foundation walls and compacted to provide stability around the basement and garage areas. Gravel is then laid inside the basement and garage to create a solid base for concrete floors.
Concrete flat work follows, where the basement floor, garage slab, driveway, and porch caps are poured and finished. The concrete is smoothed and watered down to ensure a clean, durable surface. This step is important for creating a level base for the rest of the house and outdoor areas.
Framing: Building the Skeleton of the Home
Framing is the stage where the house begins to take shape visually. The subfloor is installed using oriented strand board (OSB), a strong engineered wood product made by compressing wood flakes and glue. OSB panels are thicker on the floor than on the walls to provide extra support.
Walls are framed with either 2x4 or 2x6 lumber, depending on whether they are interior or exterior walls. Exterior walls and garage walls that connect to the house use 2x6 framing for better insulation and energy efficiency. Blocking and header boards are installed to support large openings such as windows and doors, preventing sagging and maintaining structural integrity.
Engineered I-beams, which look like the letter “I” in cross-section, are used as floor joists to span between foundation walls and support upper floors. These beams are hung in metal joist hangers and glued and nailed for stability. Support beams rest on stacked lumber columns that transfer the weight safely down to the concrete footings below.
Installing Plumbing, HVAC, and Electrical Systems
Once framing is complete, plumbing, heating, ventilation, air conditioning (HVAC), and electrical systems are installed simultaneously. Plumbing includes running water supply lines, sewer connections, and installing fixtures such as tubs, showers, toilets, and sinks. Electrical wiring is pulled through the walls, with outlet boxes, light switch boxes, and dedicated circuits for appliances carefully positioned.
HVAC installations involve running ductwork for heating and cooling throughout the home. Aluminum ducts carry air to and from the furnace and air conditioning unit, with vents strategically placed in each room for optimal airflow. Return air ducts bring used air back to the system for conditioning.
Safety features such as grounding rods tied to rebar in the foundation protect the home from electrical surges like lightning strikes. Metal plates are installed over plumbing holes in framing to prevent accidental punctures during drywall installation.
Insulation and Drywall: Sealing the Home’s Envelope
With all the utilities in place and inspected, insulation is installed in exterior walls and ceilings to improve energy efficiency and comfort. Thicker insulation is used in 2x6 walls, while interior walls remain uninsulated. Vapor barriers and plastic sheets help keep insulation in place and prevent moisture intrusion.
Drywall, also known as sheetrock, is then hung on walls and ceilings. Two types of drywall are used: standard drywall for most areas and moisture-resistant drywall for bathrooms and kitchens. The drywall sheets are screwed into the framing, with treated lumber used for bottom plates to resist moisture and termite damage.
After hanging, the drywall seams are taped and mudded with joint compound to create smooth walls. Corners receive special metal or plastic corner beads to protect edges and provide a clean finish. Rounded corners can be created with flexible corner beads for a softer look.
Exterior Finishes: Roofing, Stucco, and More
The exterior of the home is protected with multiple layers designed to keep water out. After framing, OSB sheathing is covered with weather-resistant barrier paper, followed by the application of stucco or siding materials. Stucco is applied in multiple coats, starting with a scratch coat that creates a textured surface for better adhesion.
Roofing begins with laying tar paper over the roof sheathing, followed by metal flashing and asphalt shingles. Flashing directs water away from vulnerable areas such as roof joints, vents, and edges to prevent leaks. Drip edges ensure water runs off the roof without seeping under shingles.
Windows and doors are installed with flashing and waterproof membranes around the frames to further protect against moisture intrusion.
Interior Finishes: Painting, Trim, and Flooring
Inside the home, painting begins with trim and doors before the walls are painted. Two-tone paint schemes are common, with white trim contrasting against colored walls to highlight architectural details. Closets and shelving are painted white to improve lighting and visibility.
Flooring installation includes laying carpet pads and rolling out carpet, hardwood, tile, or other materials depending on the design. Cabinets, countertops, sinks, and faucets are installed in the kitchen, bathrooms, and laundry areas. Light fixtures, ceiling fans, and electrical outlets are finalized during this phase.
Final touches include installing stair railings, shelves, and other built-in features. Caulking is applied around trim and shelves to prevent cracking and improve aesthetics.
Final Steps: Inspections, Touch-Ups, and Cleanup
Before the home is complete, several inspections occur to ensure everything meets code and quality standards. A critical "four-way inspection" checks plumbing, electrical, HVAC, and framing before drywall installation. After drywall and insulation pass inspection, the home moves toward final finishes.
Touch-ups such as paint corrections, cabinet adjustments, vent cover installations, and minor repairs are common in the last weeks. Concrete work for driveways, sidewalks, and porch approaches is finished, and scaffolding is removed from the exterior.
Finally, a thorough cleaning removes construction debris, dust, and leftover materials, leaving the home ready for move-in.
Conclusion: Understanding the Home Building Journey
Building a new home is a detailed process involving many stages, trades, and inspections. From land preparation to pouring foundations, framing, installing utilities, and finishing interiors and exteriors, each step requires precision and care. Knowing what happens during each phase can empower you to make informed decisions and communicate effectively with your builder.
If you are considering building a home in Melbourne or elsewhere, partnering with experienced Construction Companies Melbourne can make a significant difference in the quality and timeliness of your build. Understanding the process helps you anticipate what comes next and reduces surprises along the way.
Whether you’re a first-time home builder or looking to refresh your knowledge, this guide covers the essential stages of home construction, providing a clear roadmap to your new home.
"Building a house can be stressful but understanding home builders and the home build process can make things go a lot smoother."
Take the time to educate yourself, ask questions, and stay involved during each phase. Your dream home is within reach, and with the right knowledge and team, the journey can be as rewarding as the destination.
Comments