


Running a Shopify store involves more than just listing products and waiting for sales. For merchants selling products based on measurements like length, weight, area, or volume—such as fabric, flooring, printing services, or custom furniture—providing accurate pricing can be a challenge. That’s where a Shopify cost calculator becomes an essential tool. When used effectively, it can improve the shopping experience, build trust, and increase sales.
Here’s how to make the most of the Shopify cost calculator in your store.
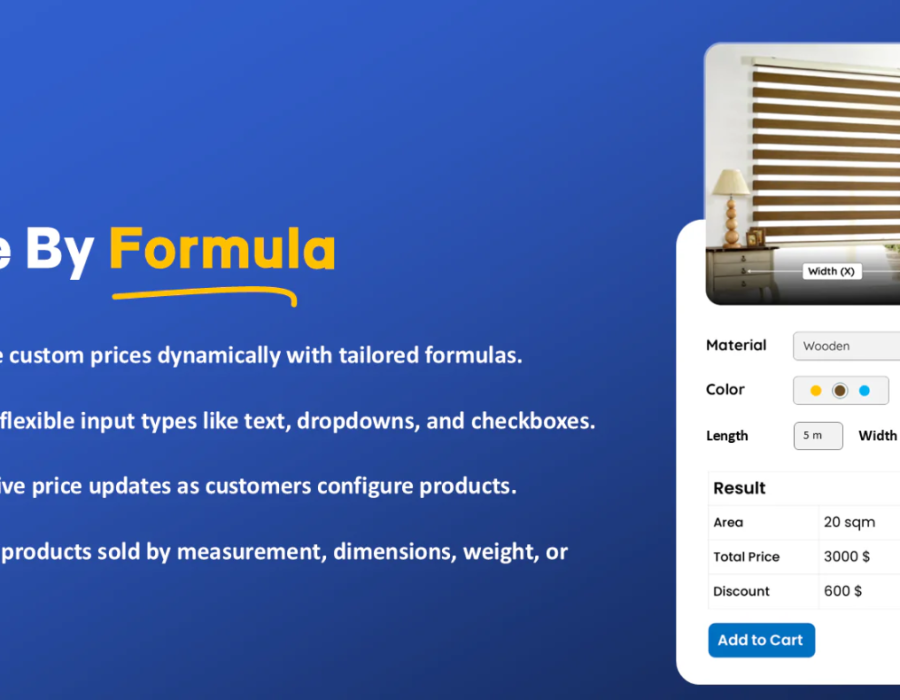
1. Understand Your Pricing Formula
Before setting up the calculator, take time to clearly define the pricing formula for your products. For example, if you sell fabric by the meter, your formula may be:
Price = Length × Price per Meter.
If you offer custom print banners, it might be:
Price = Length × Width × Rate per Square Foot.
Write down these formulas for each product type you plan to offer. Having this ready will make the calculator setup much smoother.
2. Set Clear Input Parameters
When customers use the calculator, they should know exactly what information they need to provide. Set up clear, labeled fields like “length,” “width,” “height,” or “weight,” depending on your product.
Use placeholder text or tooltips to guide customers (e.g., “Enter length in meters” or “Enter weight in kilograms”) to avoid confusion. Clear inputs reduce customer frustration and help generate more accurate quotes.
3. Use Conditional Rules for Flexibility
Many Shopify cost calculator apps, like Price Calculator by Formula, allow you to set conditional rules. This means you can apply alternative pricing when certain criteria are met—such as offering a bulk discount when the order exceeds a set quantity or adjusting prices for different materials.
For example:
- Orders over 50 square meters get a 10% discount.
- Premium material adds an extra cost per unit.
Setting up these rules ensures your pricing remains fair and competitive without manual intervention.
4. Display Real-Time Price Updates
One of the most powerful benefits of using a cost calculator is providing real-time pricing. As customers adjust their measurements or product options, the total price should update automatically on the product page.
This transparency builds trust, reduces abandoned carts, and encourages buyers to complete their orders without needing to email for a quote.
5. Test and Optimize
Before going live, test your calculator thoroughly. Run sample orders with different combinations to make sure prices are calculated correctly. Ask a few colleagues or customers to test it as well and provide feedback.
Once live, monitor how customers interact with it. If you notice abandoned carts or frequent questions, consider simplifying the calculator form or providing more instructions.
6. Promote It as a Feature
Highlight the calculator in your product descriptions, banners, or FAQs. Let customers know they can get instant pricing without waiting for manual quotes. This not only improves their shopping experience but can also set you apart from competitors.
Final Thoughts
A Shopify cost calculator is a smart investment for stores selling custom or measured products. By setting it up carefully, keeping the experience simple, and maintaining clear communication, you can turn this tool into a conversion booster that improves both customer satisfaction and your bottom line.
Comments