


Retrofitting existing walls with blown-in insulation typically involves drilling small access holes, injecting insulation material into wall cavities, and patching the holes afterward. This minimally invasive process significantly improves energy efficiency, reduces noise, and enhances comfort with minimal disruption to interior spaces. The project generally takes 1–2 days for an average home, depending on material selection and wall accessibility.
Home energy audits consistently show that walls account for 25-35% of heat loss in most homes, making wall insulation retrofits one of the most effective energy-saving improvements with potential heating and cooling cost reductions of 20-30%.
The Blown-In Insulation Process
The retrofitting process follows several distinct stages that homeowners should understand before beginning the project:
Pre-Installation Assessment
Professional installers begin by examining your home's existing insulation levels, wall construction, and potential obstacles. This assessment identifies:
- Wall cavity depth and available space
- Presence of fire blocks, wiring, or other obstructions
- Optimal access points for installation
- Moisture concerns or existing damage requiring repair
Bonus Tip: Schedule your assessment during cold weather when thermal imaging cameras can more easily detect insulation gaps and heat loss areas.
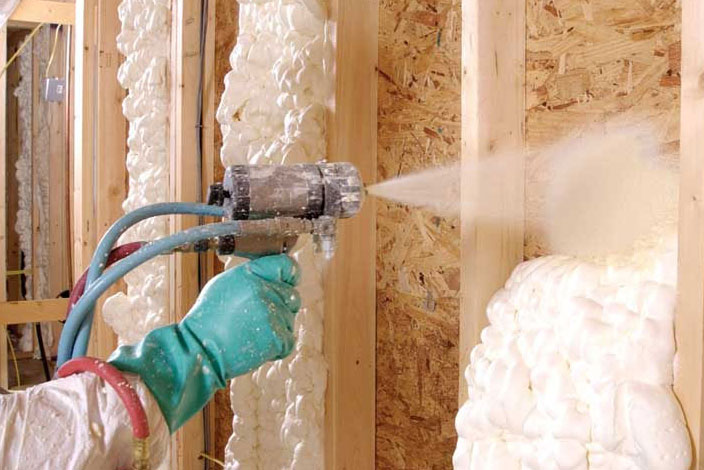
Installation Methods
Expert spray foam insulation contractor typically use one of two approaches when retrofitting walls:
Interior Installation
The most common method involves drilling holes from inside your home:
- Furniture is moved away from walls and floors/belongings are covered
- Small holes (1-2 inches) are drilled at strategic locations
- Insulation is blown into wall cavities using specialized equipment
- Holes are plugged and finished to match existing walls
Exterior Installation
When feasible, exterior installation may be preferred:
- Small portions of siding are temporarily removed or holes are drilled through exterior walls
- Insulation is blown into cavities
- Holes are sealed and siding is replaced or repaired
Post-Installation Completion
After insulation is installed:
- Contractors verify complete fill using infrared cameras or density tests
- All access points are sealed and finished to match surrounding areas
- A final inspection confirms proper installation quality
- Clean-up removes all debris and equipment

Insulation Material Options
Different blown-in materials offer varying performance characteristics:

Bonus Tip: Ask contractors about dense-pack installation techniques that minimize settling concerns with cellulose or fiberglass.
Technical Specifications
Understanding the technical aspects helps set proper expectations:

Things to Consider Before Making a Decision
Several factors should influence your retrofit insulation decision:
Wall Construction Assessment
- Older homes may have irregular framing or obstacles that complicate installation
- Presence of knob-and-tube wiring requires special consideration for safety
- Brick facades with no sheathing may require moisture management strategies
- Load-bearing walls typically have different framing that affects installation
Home Preparation Requirements
- Wall hangings, artwork, and furniture must be temporarily removed
- Access to electrical outlets may be limited during installation
- Some disruption to daily activities should be expected
- Patching and painting work follows installation (sometimes by separate contractors)
Contractor Selection Factors
- Experience specifically with retrofit applications (not just new construction)
- Proper equipment for dense-pack installation
- Quality control methods (thermal imaging, density testing)
- Detailed written proposal including R-value guarantees
- Proper licenses and insurance for your locality
Seasonal Timing
Market data indicates that installations performed during fall typically see 15-20% cost savings compared to winter installations due to reduced contractor demand and more comfortable working conditions.
Common Questions
How disruptive is the installation process?
While not dust-free, professional installations typically confine mess to immediate work areas. Most contractors use HEPA-filtered equipment and containment procedures. Expect some noise during the drilling and blowing phases. A typical room takes 2-3 hours to complete with most homes finished within 1-2 days.
Will I need to repaint my entire walls?
Usually not. Professional installers typically drill holes in inconspicuous locations (behind outlets, in closets) when possible. When visible holes are necessary, they're patched and spot-finished to match surrounding areas. Some homeowners choose to repaint for perfect matching, but it's rarely required.
Can all walls be retrofitted with blown-in insulation?
Most exterior walls can accept blown-in insulation, but some limitations exist. Walls with significant obstructions, extensive water damage, or certain types of brick construction may require alternative approaches. A professional assessment determines feasibility for your specific situation.
Blown-In Insulation FAQ
What is the expected payback period for wall insulation retrofits?
Most homeowners see energy bill reductions that provide payback within 3-7 years, depending on local energy costs, climate severity, and existing insulation levels. Homes in extreme climates typically experience faster payback periods.
Can I install blown-in insulation myself?
While DIY equipment rentals are available, retrofit applications require specialized techniques to achieve proper density and complete cavity fill. Professional installation typically delivers superior results and includes important quality control measures that DIY installations lack.
Will blown-in insulation create moisture problems in my walls?
Properly installed blown-in insulation shouldn't create moisture issues. However, existing moisture problems must be addressed before installation. Professional installers evaluate wall assemblies and may recommend vapor control strategies appropriate for your climate zone.
How long does blown-in wall insulation last?
Quality installations typically last the lifetime of the structure (40+ years). Cellulose and mineral wool maintain performance longest, while some fiberglass products may experience minimal R-value reduction over decades. Modern installations resist settling that plagued older installations.
Does blown-in insulation repel pests?
Cellulose insulation contains borate compounds that deter many insects. Fiberglass and mineral wool are not food sources for pests. However, no insulation completely prevents pest entry – addressing perimeter sealing remains important for pest control.
Make the Right Decision
Retrofitting walls with blown-in insulation represents one of the most effective energy-efficiency improvements for existing homes. Understanding material options, installation methods, and contractor qualifications ensures successful outcomes. Evaluate your specific climate conditions, existing wall construction, and budget constraints when planning your retrofit project.
For best results, obtain multiple detailed quotes from experienced contractors specializing in retrofit applications, and verify their quality control procedures include proper density verification and complete cavity fill testing.
Reviewer
Reviewer: Lily Johnson offered her feedback after reviewing this post. With 8 years in the spray foam insulation field, her suggestions centered around improving outreach to homeowners looking for quality insulation solutions.
Comments