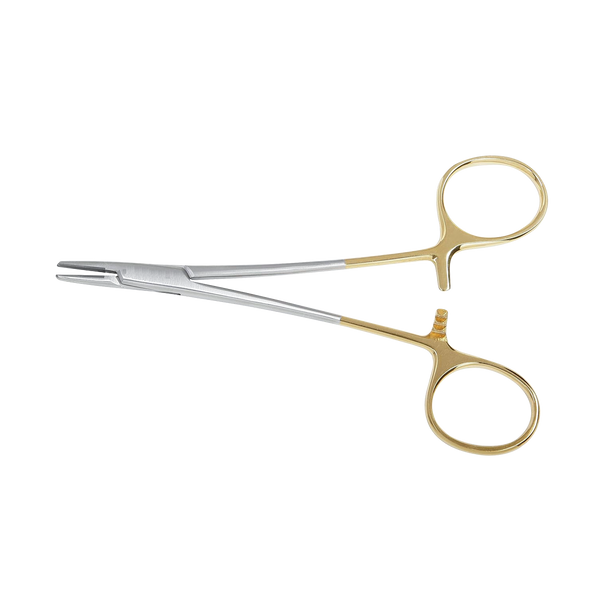
The Webster needle holder is a vital tool in surgical and medical settings known for its precision and reliability. Whether you're a professional in the medical field or someone using it in a specialized setting, proper care and maintenance are essential to ensure its longevity and functionality. A well-maintained Webster needle holder provides safe and effective use while minimizing the risk of damage. Here's a guide on adequately maintaining and caring for your Webster needle holder.
1. Clean After Each Use:
Cleaning is one of the most critical aspects of maintaining your Webster needle holder. Blood, tissue, and other substances can accumulate on the instrument, potentially affecting its functionality and posing a risk for cross-contamination if not adequately cleaned.
Steps for Cleaning:
- Disinfect the Instrument: After each use, disinfect the needle holder with an appropriate antiseptic or disinfectant solution. Alcohol-based solutions (70% isopropyl alcohol) are used for quick sterilization.
- Use a Brush: For more stubborn debris, use a soft-bristle brush to clean the serrated surfaces of the jaws. Be careful not to damage the fine teeth or other delicate areas.
- Rinse with Distilled Water: After disinfecting, rinse the instrument with distilled water to remove any residue that could cause corrosion over time.
2. Sterilization:
Webster needle holders are often used in sterile environments, so sterilization is necessary. Autoclaving is the most common method used in medical settings for sterilizing instruments, but ensure that the needle holder is compatible with this process.
Steps for Sterilization:
- Check Manufacturer Instructions: Always check the manufacturer's recommendations to verify that the instrument can withstand the autoclave temperature and process.
- Autoclave: Place the needle holder in a sterilization pouch and follow the autoclave's settings. Generally, sterilization occurs at around 121°C (250°F) for 15–20 minutes.
- Inspect Post-Sterilization: Once sterilized, inspect the instrument for any damage or discoloration caused by the heat. If any parts appear weakened or warped, the needle holder may need to be replaced.
3. Lubrication:
The joints of the Webster needle holder are subjected to frequent movement and stress during use, which can cause wear and tear over time. Lubrication is essential to ensure smooth operation and reduce the risk of rusting.
How to Lubricate:
- Use Surgical-Grade Lubricant: Apply a small amount of surgical-grade lubricant (such as petroleum jelly or specialized instrument lubricants) to the locking mechanism and hinges. This helps maintain smooth opening and closing while preventing corrosion.
- Wipe-Off Excess Lubricant: After applying the lubricant, wipe off any excess to avoid attracting dust or debris, which could affect the instrument's functionality.
4. Proper Storage:
How you store your Webster needle holder can make a huge difference in its lifespan. Improper storage can lead to rusting, bending, or misaligned jaws.
Storage Tips:
- Dry Storage: Always store the needle holder in a dry environment. Moisture can lead to rust, so avoid placing it in damp areas.
- Use a Tray or Case: Store your needle holder in a tray or case designed for surgical instruments. This prevents accidental damage, contamination, or misplacement.
- Avoid Extreme Temperatures: Never expose your needle holder to extreme heat or cold, as this can affect the integrity of the metal and cause malfunction.
5. Inspect for Damage:
Regularly inspect your Webster needle holder for any signs of damage, wear, or misalignment. This is especially important after prolonged use or if the instrument has been dropped.
Inspection Checklist:
- Check the Jaws: The jaws should align perfectly when the needle holder is closed. Any misalignment can make it difficult to hold the needle, affecting performance securely.
- Examine the Locking Mechanism: Make sure the locking mechanism functions smoothly. It may need lubrication or professional repair if it's stiff or doesn't engage properly.
- Look for Corrosion: Inspect for any signs of rust or corrosion on the needle holder. Rust can affect both the instrument's performance and sterility.
- Test the Spring: If the needle holder has a spring, ensure it works properly, allowing for easy, controlled opening and closing of the jaws.
6. Repair or Replace When Necessary:
Suppose your Webster needle holder shows signs of wear or malfunction (such as misaligned jaws, a broken lock, or excessive corrosion). In that case, it is crucial to repair or replace the tool. Using a damaged instrument could lead to poor needle handling and even risk injury to the patient in medical procedures.
- Professional Repair: For instruments that are still under warranty or are valuable, consider sending them to a professional repair service specializing in surgical instruments.
- Replacement: If repair is not possible or practical, replacing the instrument is the safest and most reliable option.
7. Follow Manufacturer's Guidelines:
Every Webster needle holder may come with specific instructions from the manufacturer regarding cleaning, sterilization, and maintenance. Following these guidelines is essential to ensure you're not voiding warranties or damaging the instrument.
Conclusion:
Proper maintenance and care for your Webster needle holder are essential in keeping it in top working condition. By following these tips for cleaning, sterilization, lubrication, storage, and inspection, you can extend the lifespan of your instrument and ensure its continued reliability in surgical or clinical applications. Regular attention to the maintenance of this critical tool will enhance its functionality and ensure the safety of both the practitioner and the patient.
For Further Information Visit: Best Surgical Supply Store


Comments