


If you own Ryobi power tools, you know how convenient cordless performance can be. From drills and saws to blowers and vacuums, Ryobi’s ONE+ system lets you use a single battery across dozens of tools. But even the most reliable batteries eventually wear out. When your tools lose power or take forever to recharge, it’s usually the battery that’s the problem, not your tools.
The procedure of your Ryobi battery replacement doesn’t have to be confusing or expensive. With the right knowledge, you can restore your tools to near-new performance and extend their lifespan. In this guide, we’ll cover everything from identifying worn-out batteries to choosing the best replacement, caring for them properly, and ensuring safety.
Why Do You Need a Ryobi Battery Replacement
Every rechargeable battery has a lifespan. Lithium-ion cells, while powerful and lightweight, gradually degrade over hundreds of charge cycles. Over time, you may notice your drill or saw running slower than usual, taking longer to charge, or cutting out mid-job.
For most users, this is the first sign that a battery replacement is needed. Trying to push a dying battery can strain your tools and even damage the internal motor over time. Investing in a high-quality replacement battery is often the smartest and most cost-effective solution. It allows you to keep your tools and accessories, maintain your workflow, and avoid spending hundreds on brand-new tools.
What Do You Need to Know About Ryobi Battery Systems
Before buying a Ryobi battery replacement, it’s essential to know which battery system your tool uses. Ryobi has several systems designed for different types of tools.
- Ryobi ONE+ 18V: This is the most popular system and includes everything from drills and impact drivers to stick vacuums and trimmers. The great thing about ONE+ is backward compatibility. New lithium-ion batteries work with older NiCad tools, meaning you don’t need to replace your tool when upgrading the battery.
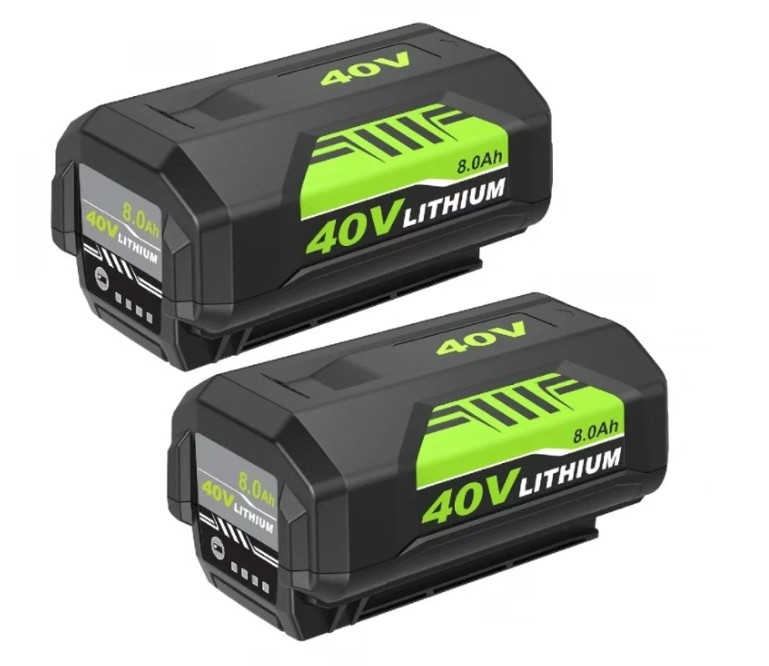
- Ryobi 40V System: Primarily for outdoor tools like lawn mowers, blowers, and trimmers. These batteries are larger and more powerful, but they won’t work with 18V tools.
- Ryobi 80V / 36V System: Designed for heavy-duty outdoor equipment, snow blowers, and other high-performance tools.
- Ryobi 12V Tek4 and USB Lithium Systems: Smaller batteries for compact tools, inspection cameras, and precision devices.
Each system has unique connectors, voltage output, and circuitry, so mixing them is not possible. Always check your tool’s voltage before purchasing a replacement battery. Using the wrong voltage can damage both the battery and the tool.
Genuine vs. Compatible Ryobi Batteries
When replacing a battery, you have two main options: buy a genuine Ryobi battery or go with a compatible alternative. Both have advantages, depending on your needs.
Genuine Ryobi Batteries:
- Tested for exact fit and performance.
- Include built-in safeguards against overheating and overcharging.
- Often come with a warranty and customer support.
Compatible Batteries:
- Typically more affordable and may offer higher capacities, like 6.0Ah or 9.0Ah, giving longer runtimes.
- Can be just as safe if purchased from reputable sellers.
- Must match the correct voltage and fit securely in your tool. Poor-quality options can overheat, degrade quickly, or even cause damage.
For many DIYers and professionals, a high-quality compatible battery from a trusted seller offers excellent performance at a lower price.
Choosing the Right Capacity
Ryobi batteries come in various amp-hour (Ah) ratings, which determine how long your tool can run on a single charge:
- 1.5Ah to 2.0Ah: Light and compact, suitable for quick tasks and small jobs.
- 4.0Ah to 6.0Ah: Balanced runtime and weight, ideal for most DIY projects or moderate professional use.
- 9.0Ah and above: Heavy-duty use, perfect for prolonged jobs with saws, blowers, or outdoor equipment.
Higher-capacity batteries provide longer runtime but are heavier. Consider how you’ll use your tool—if you’ll be holding it for extended periods, a medium-sized battery may be more comfortable.
Here’s a more humanized, detailed, and SEO-friendly version of your Ryobi battery replacement instructions:
How to Replace Your Ryobi Battery: A Step-by-Step Guide
Replacing a Ryobi battery is easier than you might think. Most users can do it safely without any tools, and it only takes a few minutes. Following the correct steps ensures your tool continues to run efficiently and extends the life of your replacement battery.
Step 1: Power Off and Unplug
Before you start, always turn off your tool and unplug it from the charger. This prevents accidental activation and protects both you and the battery. Safety is the first priority whenever you handle power tool batteries.
Step 2: Locate the Release Buttons
Most Ryobi batteries feature two release buttons or side tabs. These tabs hold the battery securely in place. Press and hold both buttons simultaneously. You should feel the battery release slightly from the compartment, signaling it’s ready to be removed.
Step 3: Remove the Old Battery
While holding the release buttons, pull the battery straight down and out of the tool. Avoid twisting or forcing the battery, as this could damage the connector pins. Take a moment to inspect the battery and contacts for dust or corrosion; cleaning them with a dry cloth can improve performance.
Step 4: Prepare the New Battery
Before inserting the new battery, check the specifications carefully:
- Voltage: Match the voltage of your tool (e.g., 18V). Using a different voltage can damage the tool.
- Chemistry: Ensure the battery chemistry (e.g., Lithium-ion) matches your tool’s requirements.
- Amp-Hours (Ah): The Ah rating affects runtime. Choose the same or higher capacity for longer use.
Step 5: Install the New Battery
Align the new battery with the tool’s compartment. Slide it straight in until you hear a firm click, indicating it’s securely seated. Give it a gentle tug to make sure it’s locked in place and making proper contact.
Step 6: Charge Fully Before Use
For optimal performance, fully charge your new battery before the first use. This balances the internal cells and helps maximize runtime. Always use a compatible charger designed for your Ryobi battery system.
Tip: Keeping a backup battery on hand allows you to swap quickly during long projects, preventing downtime and maintaining productivity.
How to Extend the Life of Your Ryobi Battery
With proper care, a Ryobi battery can last for years. Here are some practical tips:
- Charge correctly: Remove the battery when the charger indicates full. Continuous charging stresses cells over time.
- Avoid deep discharge: Recharge before the battery completely dies to reduce wear.
- Store at moderate temperatures: Extreme heat or cold can degrade lithium-ion cells.
- Clean contacts regularly: Wipe terminals with a dry cloth to maintain proper electrical connection.
- Use approved chargers: Non-certified chargers can cause uneven charging or overheating.
Following these habits can double your battery’s lifespan and keep your tools running efficiently.
Signs You Need a New Battery
It’s not always obvious when a battery has gone bad. Watch for these indicators:
- Tool stops working even with a full charge.
- Battery drains faster than normal.
- Charger lights flash red and green.
- The battery feels hot during charging or use.
- Unusual noises or reduced performance.
If these symptoms persist, it’s safer to replace the battery than risk damaging your tool.
Safety Considerations
Lithium-ion batteries are powerful, but they require safe handling:
- Never use a damaged or swollen battery.
- Avoid exposing batteries to water or direct sunlight.
- Don’t mix old and new batteries in dual setups.
- Dispose of old batteries through certified recycling programs.
Safe handling ensures your tools and your workspace remain protected.
Where to Buy Reliable Ryobi Battery Replacements
Trusted sources for Ryobi battery replacements include:
- Official Retailers: Home Depot and other authorized Ryobi dealers sell genuine replacements.
- Online Stores: Amazon, eBay, and specialty stores offer both genuine and high-quality compatible options.
- Battery Specialists: Stores like USA Batteries provide premium cells tested for long life and backed by warranties.
Always check compatibility, read reviews, and confirm warranty terms before purchasing. A reliable battery ensures consistent performance and peace of mind.
Frequently Asked Questions
Can I use a 40V battery in an 18V tool?
No, voltage systems are not cross-compatible. Using a 40V battery in an 18V tool can damage both.
Are Ryobi ONE+ 18V batteries backward compatible?
Yes. All ONE+ 18V batteries, old and new, work across the platform.
How long does a new battery take to charge?
Typically 60–90 minutes, depending on capacity. High-capacity batteries may take longer.
Can I leave my battery on the charger overnight?
It’s best not to. Modern chargers stop charging automatically, but prolonged trickle charging can slightly reduce battery life.
Final Thoughts
Replacing a Ryobi battery doesn’t have to be daunting. Understanding your battery system, choosing the right replacement, and maintaining it properly ensures your tools stay powerful and reliable for years. Whether you opt for a genuine pack or a high-quality compatible alternative, investing in the right battery saves time, protects your tools, and makes your DIY or professional projects smoother and more efficient.
With the proper knowledge and care, your Ryobi tools will continue delivering cordless power exactly when you need it.
Comments